Axcast opens from the Inventor ribbon and works the same way whatever you are exporting: choose what to export, choose the formats, choose where the files go, then run it.
1. Choose what to export
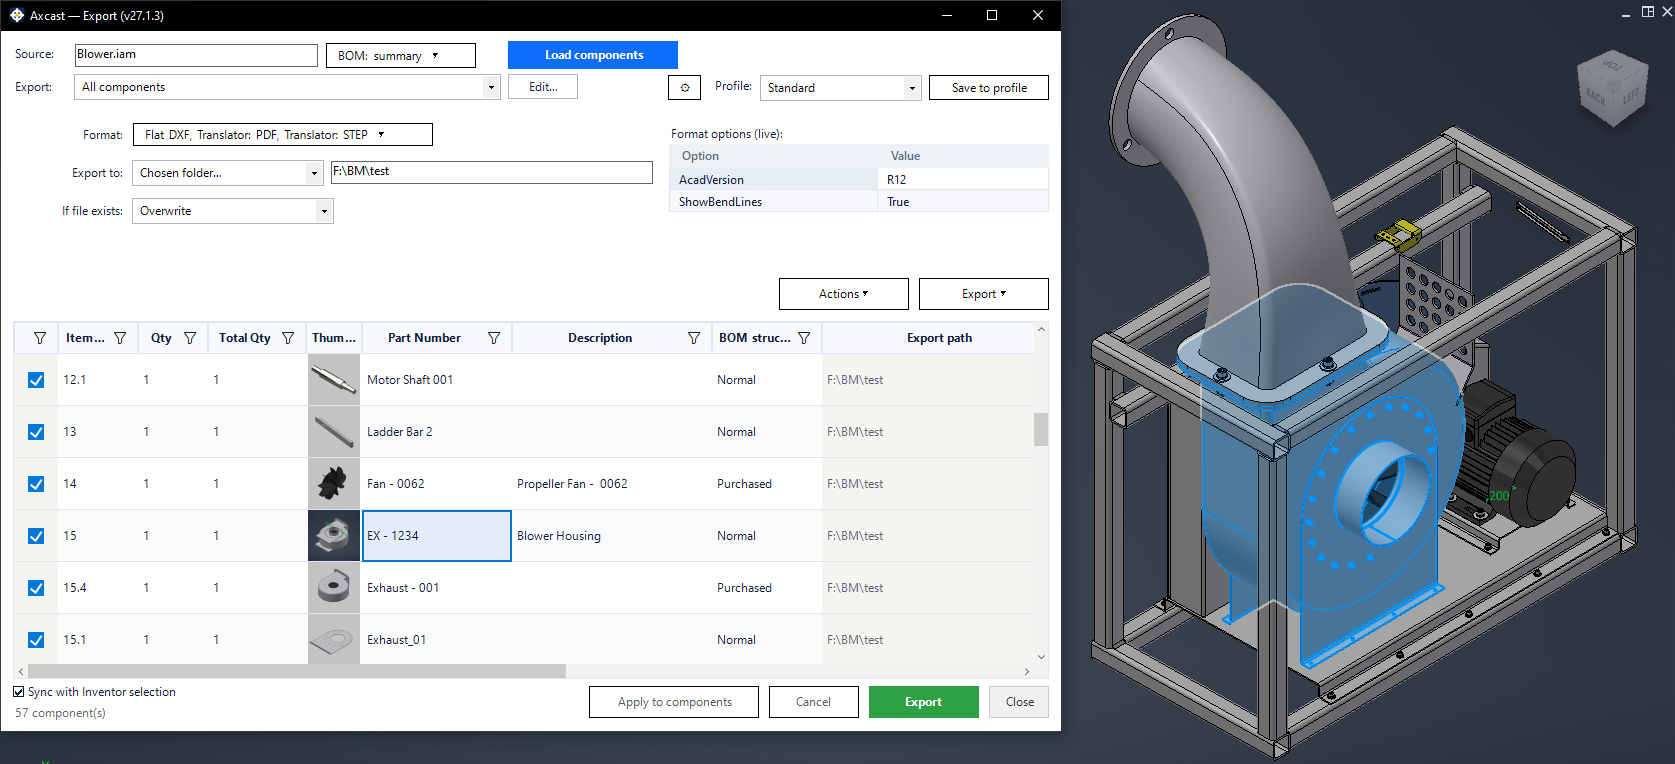
The source row at the top selects where the component list comes from — the active document, a folder (optionally including sub-folders), or back to the active document again. Load components reads the list into the grid.
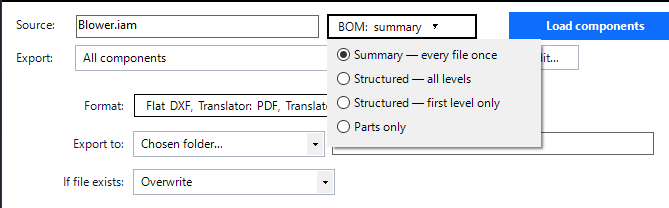
For assemblies, the BOM level decides how deep to read: first level, all levels, parts only, or a summary with one row per unique file.
2. Narrow it down
The Export scope row applies a saved component filter, so you can export only the sheet-metal parts, only purchased parts, or whatever else your filter Blocks describe. You can also work from the current Inventor selection, and Sync with Inventor selection keeps the grid and the model highlighted together in both directions.
The grid itself has Excel-style column filters, so you can sort, filter, reorder and hide columns before running, and untick individual rows.
Working on the list itself
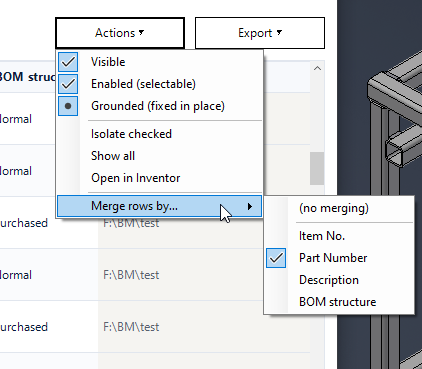
The Actions menu applies to the rows you have checked, without leaving the dialog: toggle Visible, Enabled and Grounded, Isolate checked, Show all, or Open in Inventor. Merge rows by… groups the list on Item No., Part Number, Description or BOM structure — useful when the same part appears many times and you want one row for it.
3. Choose the formats
Format is a multi-select: tick every format you want and they are all written in the same run. The Format options grid below shows the selected format’s own settings, read live from the translator, and any value you change is sent as an override for that format only.
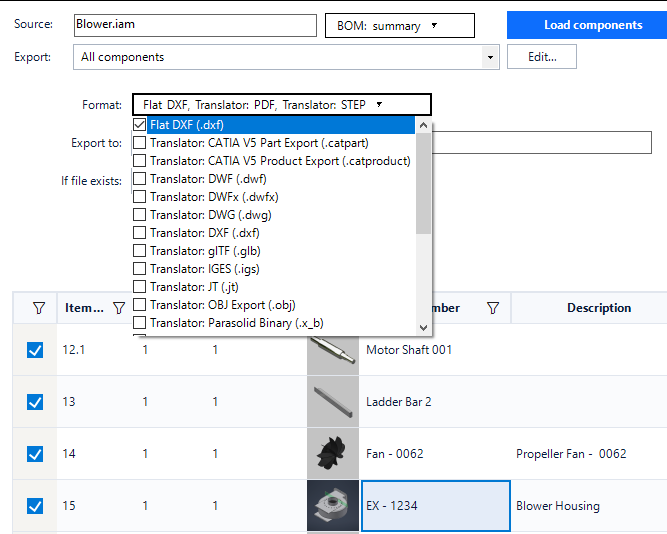
Axcast offers the formats your installation has, not a fixed list. A translator is still the final judge of whether it can write a particular document, so a format that does not suit a given file will report that on the row rather than producing a file.
4. Choose where the files go
- Main document folder — the default; everything lands beside the document you started from
- Beside each source file — each output next to its own source, flat
- Chosen folder — click the folder box to pick one
Within that destination, each format gets its own sub-folder and each run gets a fresh one. If file exists decides what happens on a collision: add a unique suffix, overwrite, or skip.
Individual rows can override the folder or the file name in the Export path and Export name columns, and a chosen folder can be applied to every row at once. The default naming rule is set per profile — see Export name.
5. Run it
Export starts the run, with a progress bar and a Cancel button. When it finishes you get a summary of how many files were written, failed and skipped. Components that no selected format accepts are never opened at all.
The component list as you have filtered it can be written to Excel at any time — see Excel output.
Exporting sheet-metal flat patterns to your fabricator’s bend allowance is covered separately in Sheet metal.