Every BLUE MECH add-in installs the same way and appears inside Autodesk® Inventor®. See a product’s page for its specific installer.
1. Install
- Close Inventor if it is running.
- Download the installer from the product page on bluemech.de (or its Autodesk App Store listing), run it, and follow the prompts. A short “Setting up BLUE MECH…” window may appear while it finishes.
- Start Inventor.
2. Activate the add-in (first launch)
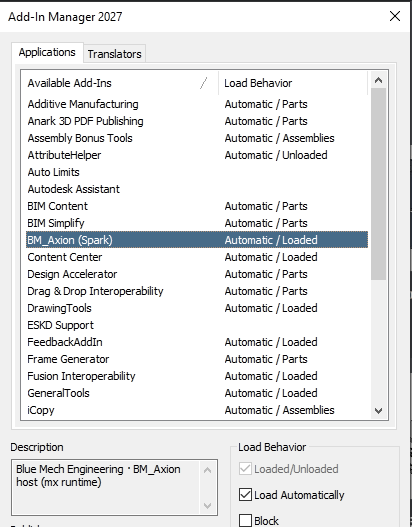
On the first launch after installing, switch the add-in on in Inventor’s Add-In Manager:
- Open Tools > Add-Ins.
- Find the add-in in the list. It is named by its runtime: Spark on Inventor 2025 and later, or Pulse on Inventor 2024 and earlier.
- Make sure it is not Blocked, and that Loaded and Load Automatically are both checked.
- Click OK — close and reopen Inventor if prompted.
The add-in’s commands appear on the BM tab, added to the relevant Inventor ribbon (Part, Assembly, or Drawing).
3. Activate your licence
- Open the Axion Dashboard: from Inventor’s Home screen (with no document open), click the BM tab, then click the Dashboard button.
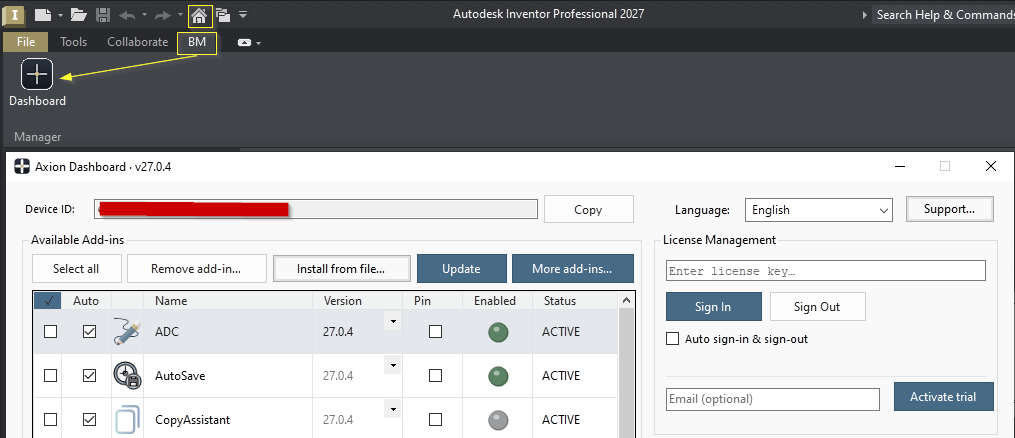
- Enter the licence key from your purchase confirmation email — also available in your account on bluemech.de — and sign in to activate.
- Your licence is tied to this computer. To use it on another machine, sign out here first to free the seat, then sign in there.
- An All-Apps licence activates every included add-in at once — you only sign in once.
Runtime — nothing to configure
The add-in automatically uses the correct runtime for your Inventor version — Pulse on Inventor versions before 2025, and Spark on Inventor 2025 and later. The installer delivers the right one; you don’t choose or manage it.